


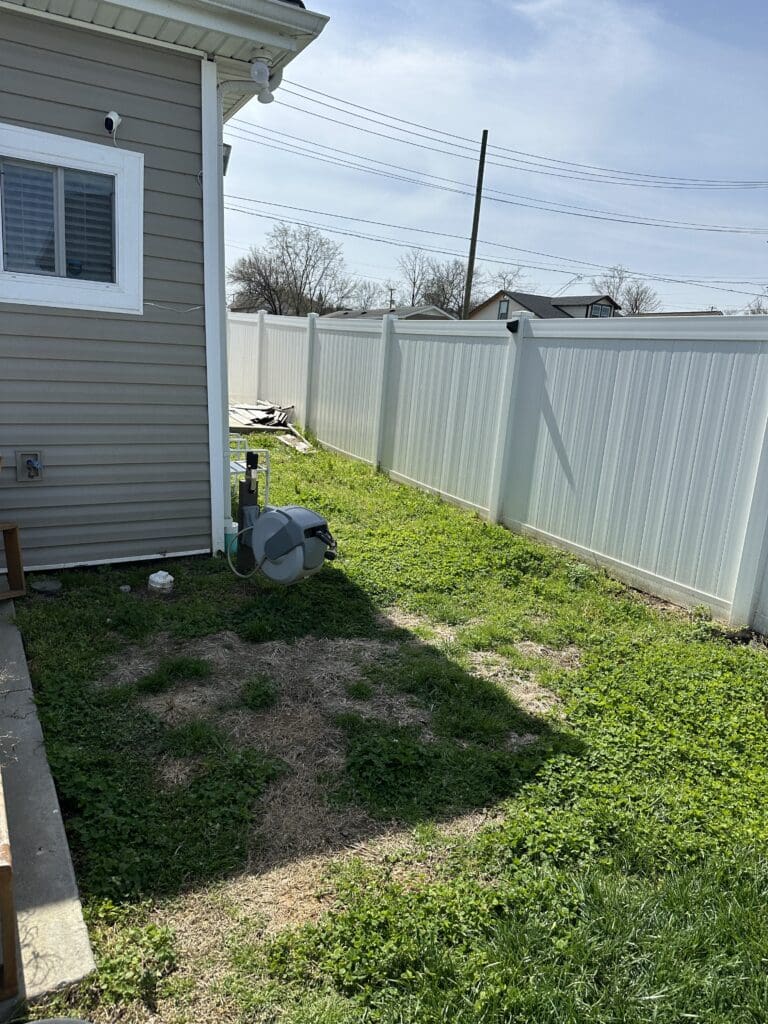
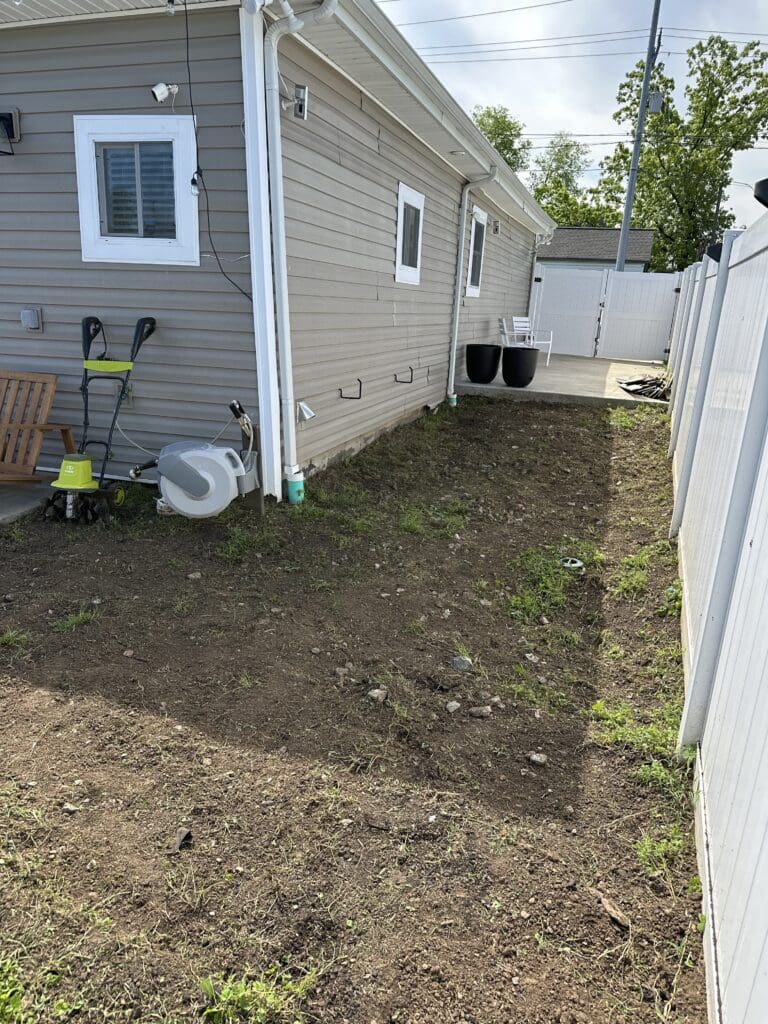
This little corner of my yard used to drive me crazy. When it rained, it would turn into a mini swamp—just enough standing water to attract every mosquito in the neighborhood. And every time I got out of my car, I was reminded of how awkward the space was: too small to be useful, but too big to ignore.
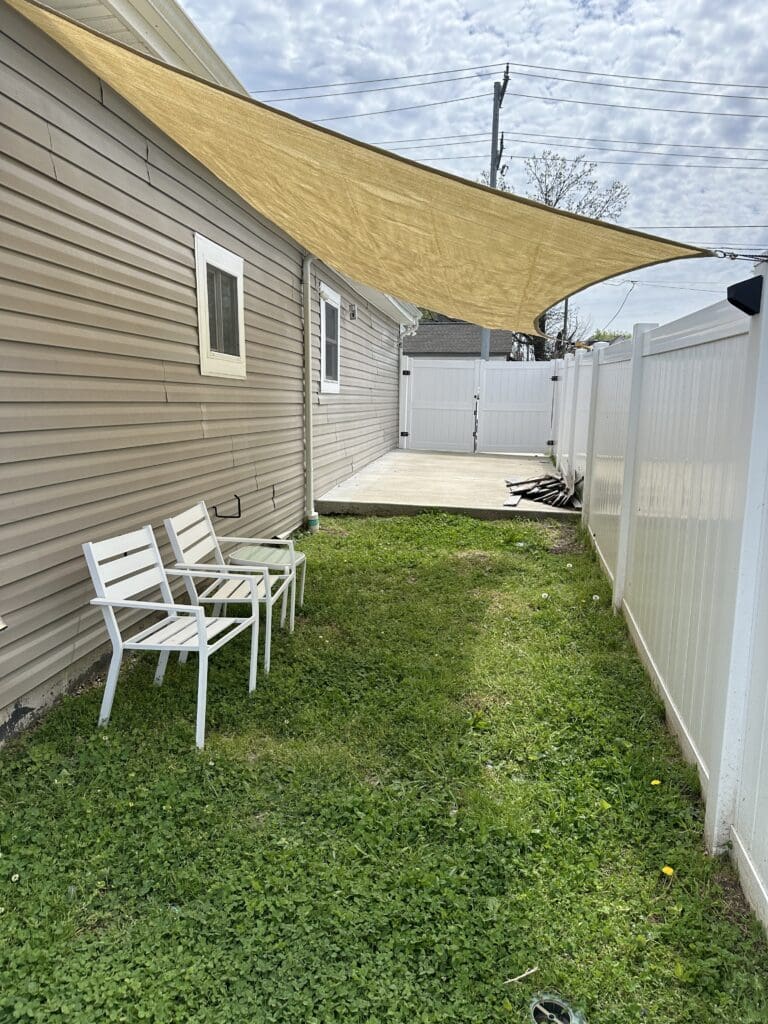
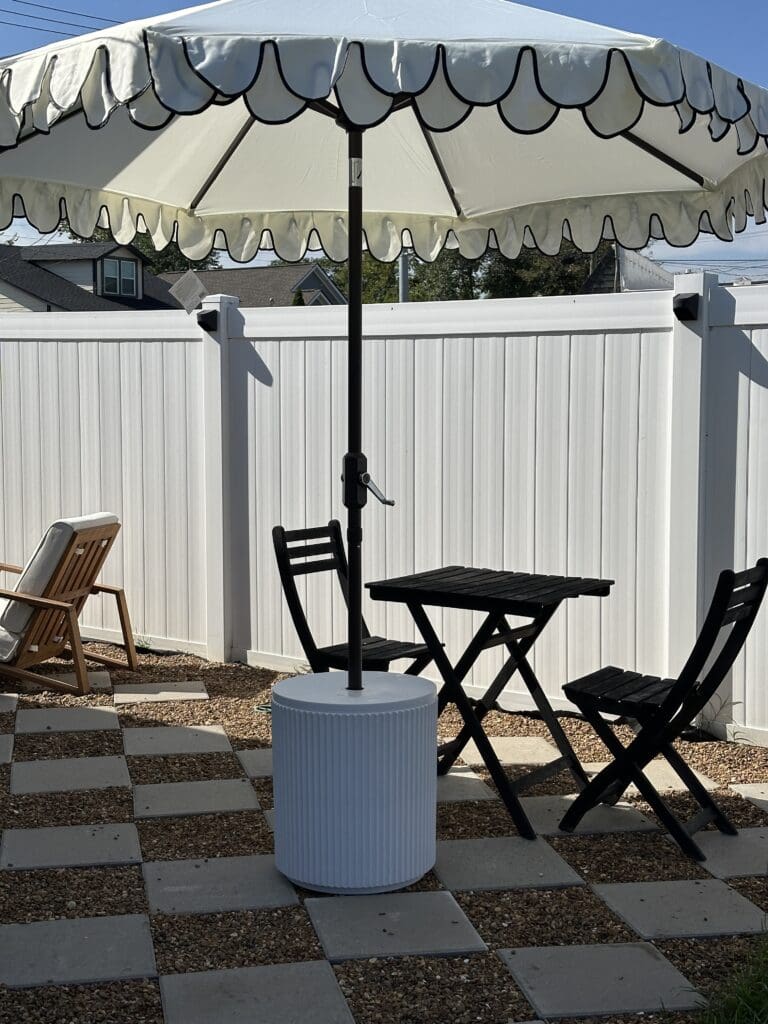
I finally hit my limit and decided it was time to make a change. I wanted a cozy, functional space where I could host outdoor dinners, watch movies with friends under the stars, or roast s’mores with my pups in the fall. So—I made it happen.
And the best part? You can do it too. Here’s exactly how I transformed this sad patch of grass into one of my favorite parts of the house.
Here’s how you can do it too:
Materials Used
(I kept track of everything in [Backyard Project] – feel free to use it as a checklist or cost planner!)
- Tarp
- Tiller
- Tamper
- Weed Barrier Roll
- Bulk – Sand – Brown fine masonry sand
- Bulk – Gravel – 3/8″ Brown River Gravel Tipload
- Concrete Pavers
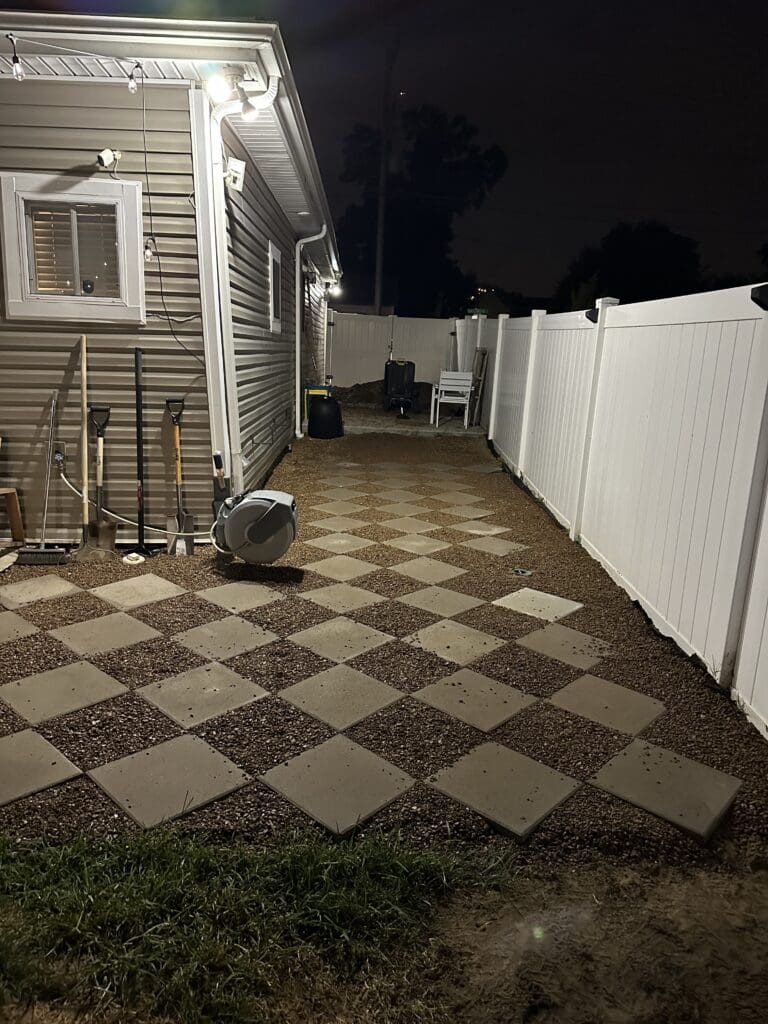
Before & After
Step 1: Remove the Grass & Level the Area
Start by clearing the space completely—till up any grass, weeds, or leftover roots with a tiller. Then, take your time leveling out the area. This part isn’t glamorous, but it makes a huge difference in the final look and longevity of your patio.
Step 2: Lay Down a Weed Barrier
Roll out a weed barrier fabric to help keep unwanted plants from popping up between your pavers later on. It’s a small step that saves you a lot of maintenance.
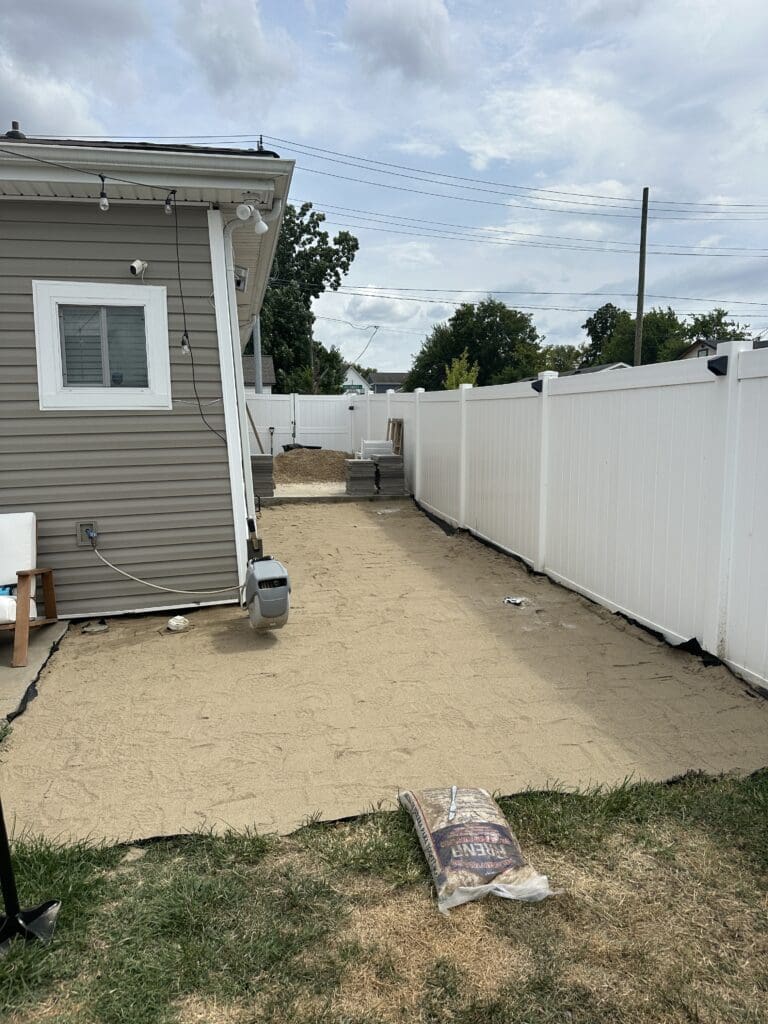
Step 3: Add a Base Layer of Sand
I had sand delivered onto a tarp and used it to create a solid, even foundation for the pavers. Spread it out evenly across the area and smooth it out with a rake and level it with a 2×4 board. Then tamp it down with a tamper!
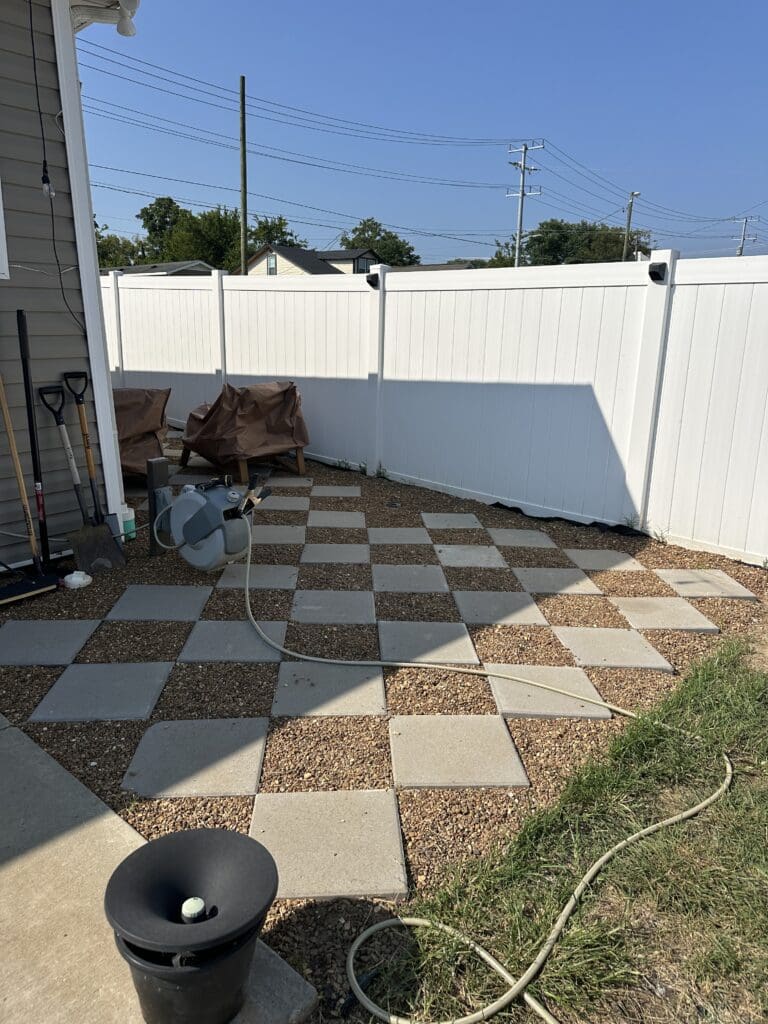
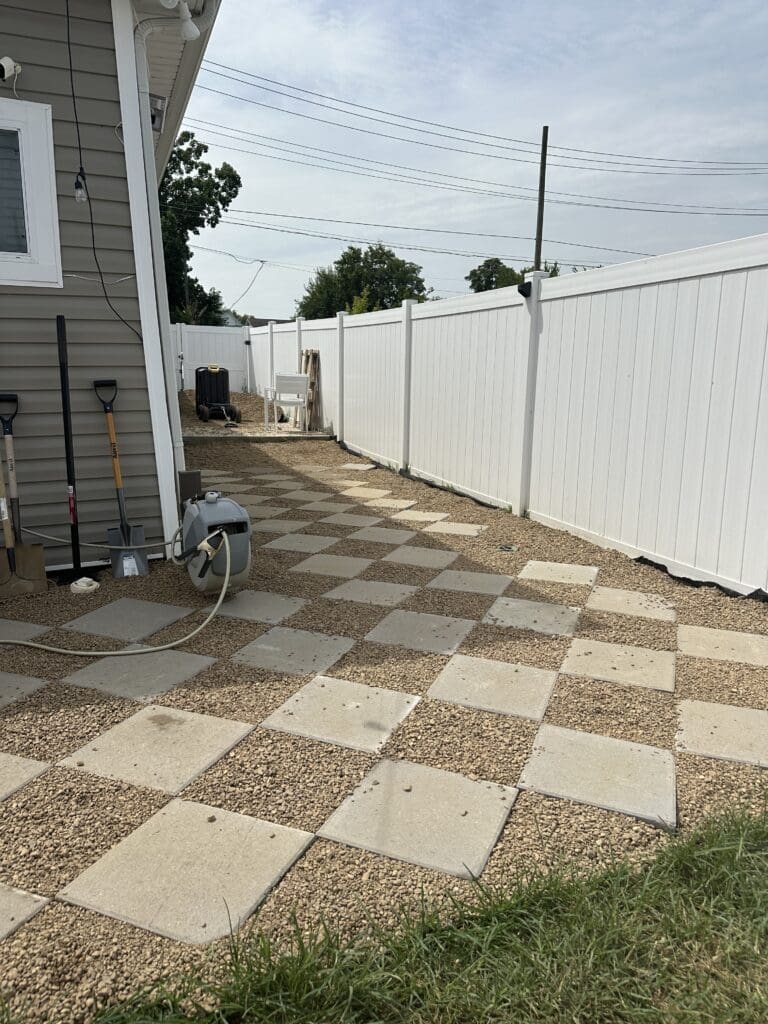
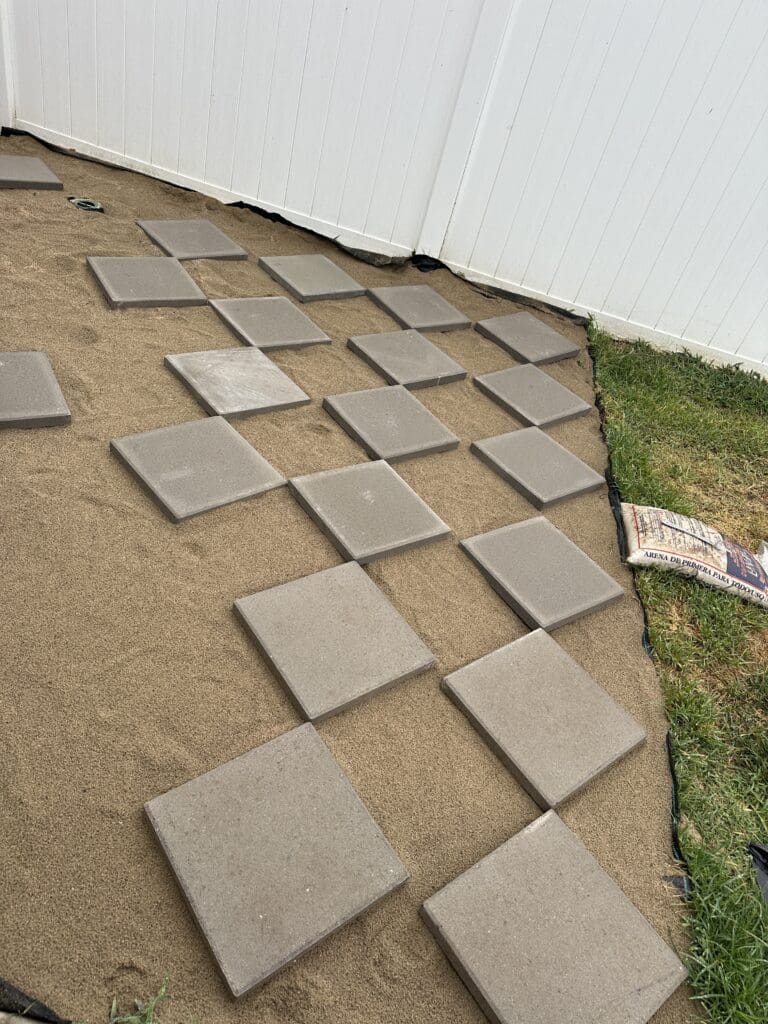
Step 4: Place the Pavers in a Checkered Design
This is where the fun begins. I opted for a checkered pattern using square concrete pavers—it’s clean, modern, and easy to DIY. Play around with spacing and design before committing to the layout.
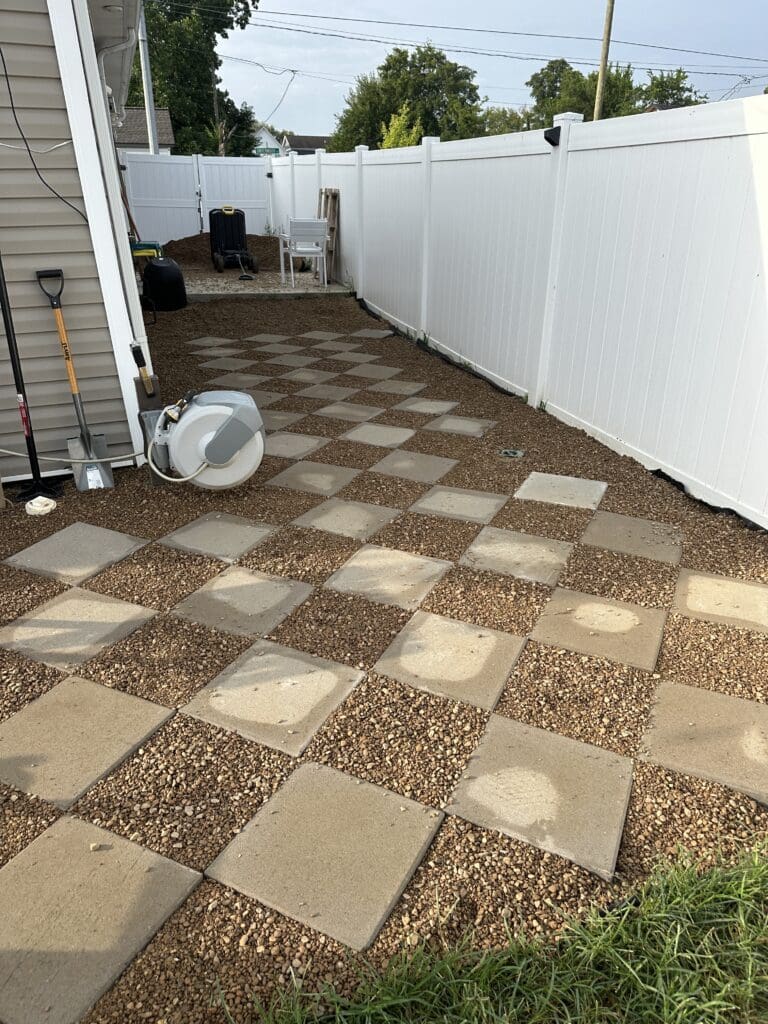
Step 5: Fill in the Gaps with Gravel
Once the pavers are in place, pour gravel into the spaces between them. It locks everything in, keeps weeds out, and adds a nice texture contrast. I used a light-colored gravel for a bright, clean finish.


Read the Comments +